Resources: Worksheet (PDF), Worksheet (text document) Rise Set Time (RST) Calculator, Iowa Robotic Observatory Request Form and Old RST Calculator, Old RST Calculator Instructions, Skymaps.com, Stellarium Web
Additional Resources: Image Archive, Iowa Robotic Observatory Main Website, Winer Observatory Website, Deimos Software
Terminology: Apparent Magnitude, Local Sidereal Time, Hour Angle, Meridian, Focal Length, Right Ascension, Declination
Tutorials: Observing Guide
Demonstrations: Sidereal Time, EM on Earth, Filters, Atmospheric Effects, Frequency Allocation Chart
CCDs and Optics

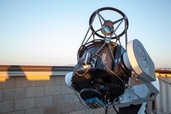
Astronomers rarely look through the eyepiece of a telescope anymore when observing the sky for research. Research telescopes use electronic sensors called CCDs (charged coupled devices) to record the image coming in through a telescope's optics. They also use precise motors to point the telescope and to track objects in the sky as the Earth rotates. Often, the telescope will be entirely controlled by computer, so that an astronomer can schedule an entire night's worth of interesting observations without needing to manually control the telescope the entire night.
When using a simple optical telescope to look at the night sky you could just point it at random objects to see what you can see, but you would probably see a lot more interesting things if you planned ahead. You would look in an atlas or do other research to find out what interesting objects would be in the sky that night. You would do some checking to make sure that the objects will be visible with your particular telescope. When using a more advanced telescope with electronic sensors and computer-controlled pointing to take astronomical images for research, planning ahead and knowing what your instrument is capable of are also very important.
The CCD in a telescope camera works a lot like photographic film - a shutter in the camera opens to expose the surface of the chip to light from space. The longer the chip is exposed, the more light builds up. Very dim objects require long exposure times to see. If too long an exposure is used on a very bright object, the chip will be overexposed and the resulting image will not be usable.
Filters
Most astronomical cameras also have colored filters to block out certain kinds of light. These filters can allow one to see how bright objects are in different colors, or to look at the specific spectral line of a common element such as hydrogen. Look at the example image below. Hubble Space Telescope took this image of a galaxy using different filters. In the lower left, you can see the image taken in ultraviolet, then the next five filters were taken in the optical, or visual, regime of the electromagnetic spectrum, and finally the image on the lower right is an infrared image. While each image shows different properties and structure of the galaxy, it is best to combine all the images to produce a complete image, which is the center image of the galaxy.
While having a color image is helpful to understand properties of the object and they are beautiful to look at, we call these images false-color images. The colors don’t represent the true appearance of the object, instead we have assigned color filters to help bring out features. In many cases, like the red Hydrogen Alpha filter, it is tracing an atomic transition, not a real color that you would see with your eyes. Similarly, the green filter traces O III (oxygen 3), so when you look at a false color image and see green, you know it is showing you an ionized state of oxygen. It is convenient to use colors to map out these features, but the galaxy isn’t actually green.
Here is a nice summary of different properties of astronomical images, though it may be specific for Hubble Space Telescope at times.

Target Selection
When using a simple optical telescope to look at the night sky, you could just point at random objects and locations to see what you could see, but you would probably see a lot more interesting things if you planned ahead. To start planning, you would need to look on a sky map or use software to find out what interesting objects would be in the sky on the night you will be observing. You would need to do some checks to make sure that the objects will be visible with your particular type of telescope. Sky maps show the night sky at a particular latitude (Iowa City is about latitude 40°) during a particular time of the year.
One option to obtain a sky map is to visit SkyMaps.com and click the map at the center of the page that says ‘Download the latest issue’ below it. Scroll down and click on the ‘Download’ link for this month (make sure to pick the correct edition (Northern, Equatorial, or Southern)). There are two pages of this sky map. The circle on the first page shows the dome of the night sky, all stars and objects that will be up in the sky tonight above you. Both pages have information about how to read the map and what’s in the sky. The map is searchable, so you can look for objects you’re interested in in that manner. In the bottom right of the first page, you can see a key of the types of objects labeled in the sky. On the second page on the right hand side, there are lists of best objects for viewing with the naked eye, binoculars, and telescopes. The objects the most interesting in appearance will come from the binocular and telescope lists (the naked eye list is mostly just individual stars, which will appear as a point of light in an image). You could also use Stellarium (or possibly Stellarium Web (find instructions here)) as a sky map by setting the application to the correct observing location, date, and time.
When using a more advanced telescope with computer-controlled pointing and electronic sensors to take astronomical images for research, planning ahead and knowing what your instrument is capable of in advance are even more important so time, energy, and resources are not wasted. Research telescopes use precise motors to point the telescope and to track objects in the sky as the Earth rotates. Often, the telescope will be entirely controlled by computer, so that an astronomer can schedule an full night's worth of interesting observations without needing to manually control the telescope the entire night.It's important to study any altitude restrictions or considerations. The night sky is measured from 0 degrees near the horizon up to 90 degrees directly up above, but that doesn't always mean the full sky is available to you. You might have trees or buildings at your observing location, blocking views of the horizon. Or a telescope dome itself might obstruct low altitudes. Note that this applies to the Van Allen Observatory; there is a lower limit on altitude observations of about 30 degrees. Furthermore, it's generally just best to observe objects when they are as high in the sky as possible (as close to the meridian or zenith as possible, at the highest possible altitude) so your images are taken through as little atmosphere as possible; this will improve your data quality. You could explore the altitude of your objects with Stellarium (or possibly Stellarium Web (find instructions here)).
Levels: 1 & 2
Learning Goals: The goal of this lab is for students to learn about the IRT Telescope operated by the University of Iowa, which they will use to conduct observations for their labs and final projects, how to submit an observation request with Rigel, and introduce students to basic image analysis.
Challenge: Pick an object in the night sky to observe with the IRT. Determine what images you will need in order to answer a simple science question about your object, then properly submit a request for those observations to the IRT.